Dota 2 turned 10 this year and despite being old, the hype for this game isn’t looking to stop anytime soon. The popular MOBA game has hundreds of thousands of concurrent players and therefore, a variety of errors and problems are imminent.
One of them is Dota 2 being stuck on the loading screen which forces the players to restart their computers before they can relaunch the game. This can happen suddenly irrespective of how well the game was running previously.
In this guide, we will be showing you the possible reasons for this occurrence and how you can solve it through our step-by-step methods.
Why Does Dota 2 Get Stuck on the Loading Screen?
There are quite a number of reasons why it would happen in the first place. It can be due to the driver or it can also be related to your hardware. There can be more reasons for this including the software conflict or even the file corruption.
If you want to ensure the problem doesn’t get in your way ever again, follow the methods we listed below in sequence and hopefully, you will be back in the game with no problem.
Verify Integrity of Files
If your game files get corrupted, there is nothing you can do except for repairing them. Fortunately, Steam has the option for repairing and restoring the game files in just a couple of minutes.
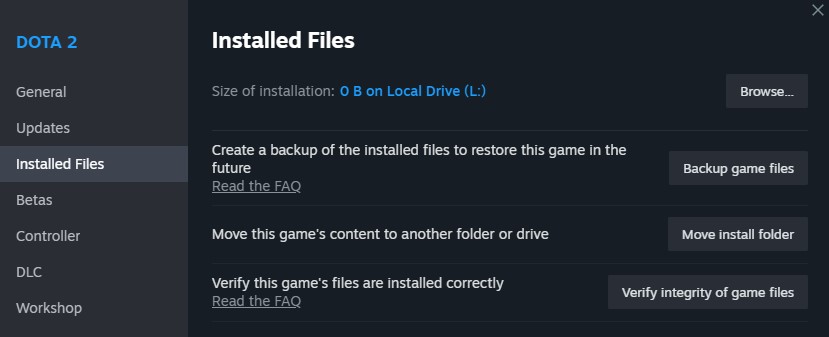
First, right-click on Dota 2 > Properties > Installed Files. Now click on “Verify integrity of game files” and it will repair or restore any corrupted game file.
Use a Launch Command
The next step is to utilize the Launch Command which has solved this issue for a lot of gamers. All you need to do is add “~autoconfig” to the Launch Options.
Right-click on Dota 2 > Properties > General. Now under the LAUNCH OPTIONS, type “~autoconfig” and close the window. Relaunch the game and this time you are most likely going to see the problem going away.
Delete Video.txt File
Another weird but working fix is to delete a game file called Video.txt which is apparently the cause for the endless loading screen. You don’t have to worry about deleting this file because it won’t break the game.
Right-click on Dota 2 > Manage > Browse Local Files. Once you are in the Dota 2 Beta folder, go to game > dota > cfg and locate the file namely “VIDEO.txt“. Delete the file and run Dota 2 from the Steam library.
Steam will automatically create another Video.txt file but this time your game won’t freeze on the loading screen.
Related: Dota 2 Console not opening
End Background Applications
If you are still struggling with the same problem after implementing all three methods above, it’s time to check for background apps. Sometimes the game may lack enough computer resources to operate properly. Freeing your CPU, memory, and GPU usage may help resolve the problem.
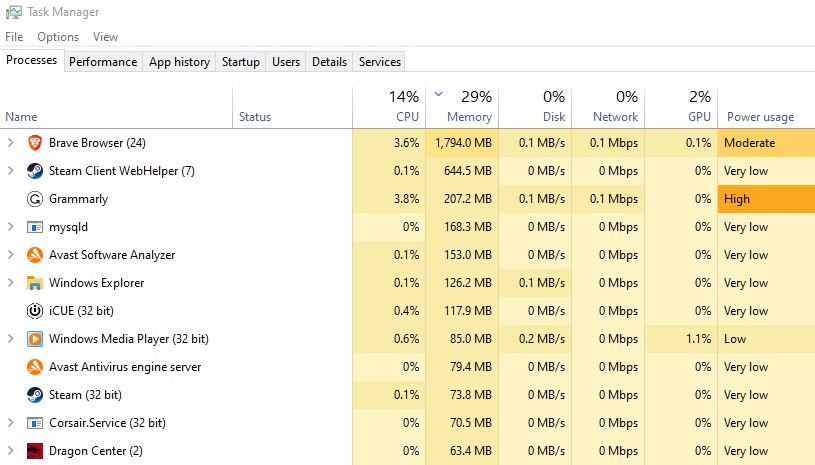
Open the Task Manager and close all unnecessary and non-essential applications running in the background. This may include browsers, MS Office, Skype, overlay apps, or any similar applications.
Remember that you do not have to end any Windows process or a process that is directly related to Steam and GPU.
It’s recommended that you close applications that are used to record the gameplay such as OBS or Nvidia Geforce Experience. If you are running Discord in the background, close it as it is known to cause conflict with certain games and can also cause high GPU usage.
Defragment Hard Drive
Another reason why you might see an endless loop of loading screen is low disk space. Games and applications need some free space on your drive to create and modify files. If you are running low on space, your game might not work properly.
If you are using a traditional mechanical hard drive, it’s recommended to defrag/optimize your drive which contains the Steam folder.
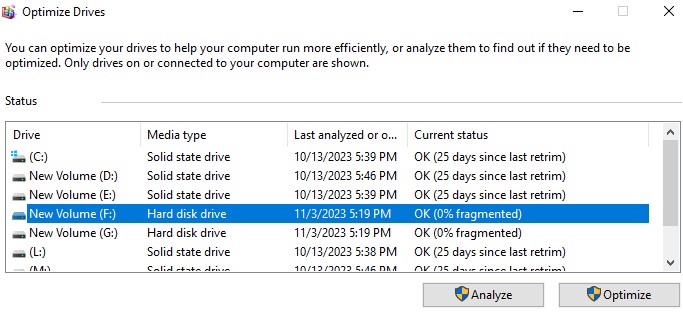
Type “Defrag” in the Windows Search Bar and select “Defragment and Optimize Drives”. Select the drive you want to defrag and click on “Optimize“. This may take several minutes but it will help boost your hard drive speed.
Update GPU Drivers
Finally, if nothing of the above worked, update your GPU drivers. An outdated GPU driver can cause many problems and generally end up in resulting poor gaming performance.
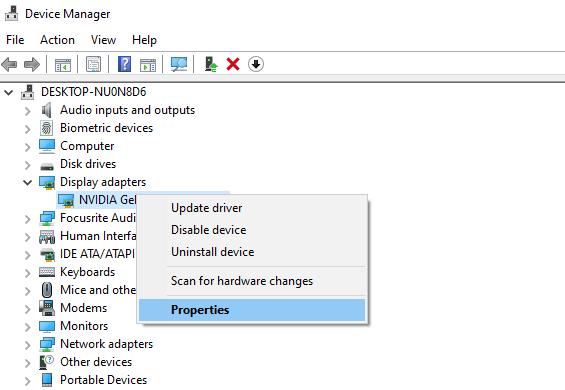
If you want to update the GPU driver through Windows OS, open Device Manager and select Display adapter. Select your GPU and right-click > Properties.
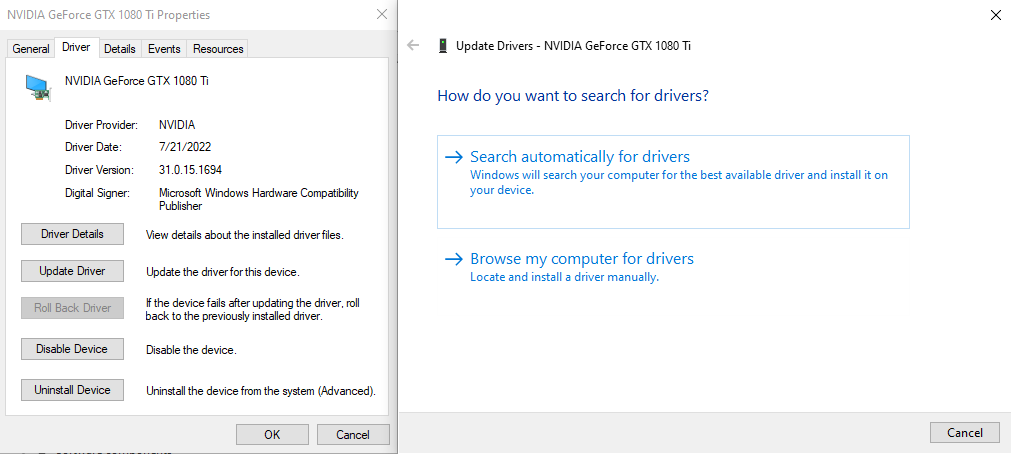
Now click on “Update Driver” and a window will pop up asking you to search the drivers automatically or Browse computer. Select the Automatic option and let the process complete the update.
Another better alternative is to update the GPU drivers from the GPU manufacturer’s official website. Depending on the GPU you have, go to its manufacturer GPU driver page and download the latest driver.
Conclusion
We understand that it can be very frustrating to get stuck in a situation that doesn’t even list the reason for the problem. However, with the above-explained methods, most players were back in the game in no time and you should expect the same.